So, if I lived in town and could walk to the store and cook something wonderful for dinner on a whim, I think I would still try and put together a tentative weekly menu. With that being said, I most likely would not always stick to it. I have mentioned before that I'm a good 30 minutes away from a market. I will not count the 20 ish minutes it takes to get to "Holiday Market" because I'm not impressed with the quality and the prices are HIGH!
I have made a habit of making a weekly menu based off of sales and coupon deals. Two weeks ago I had the pleasure of attending a "Women's Fun Day" at my Church, Westside Church International in Placerville. It was a casual day with Ladies sharing tips and tricks from everything from organization, budgeting and money saving tricks. I also shared some of my couponing tips. The biggest advice I would give anyone who wanted to get started in couponing would be go to www.couponmom.com it's a free website. Watch the tutorial that they offer and check in to see what great deals can be had. One of the Ladies that spoke has seven children and lives even further up the hill then I do. Her tip is that she sits down and plans a month long menu, including what she will serve for breakfast and lunch. I have only ever planned my dinners. I loved this idea! So I'm one week into this and I'm loving it so far! She also shared that she buys a lot of her staples like grains from a company called Azure Standard. I went to their website www.azurestandard.com and they sent me out their catalog right away. I can order organic grains such as my new favorite staple, quinoa and spelt flour for much less then I would pay at the market or even Costco.
As much as I like to save money with couponing, I will not buy stuff that is not nutritionally sound except maybe an occasional package of oreo's") typically I go to Costco once or twice a month and buy meat and other staples. Then, I coupon for things like shampoo, conditioner, body wash, soap, razors, deodorant (most of which I get free or at least half off) and things like yogurt, cheese, sauces, and dressings.
Now my plan for menu planning and couponing is as follows:
1. Make a monthly plan for meals including breakfast, and lunch.
(A helpful hint that was shared was to have at least 30 recipes for planning dinners so that there will be a good variety, if there is a recipe that you or your husband does not like toss it)
2. Make a list of what you will need from Costco or Sam's Club. For me this is meat, cheese, and bread.
3. Make a list of organic grains and items that you can order from Azure Standard.
4. Now, I break my month down into a week and post the weekly menu so my family can see what's on the menu. Also, each week I will make a run to the market for fresh produce and anything that I can coupon that we need based on Sunday's adds and the deals on couponmom.com .
March is my first month of doing this. One thing I planned to do was "crockpot chicken Fridays" I'm gone from 8:30 a.m. until LATE on Fridays, sometimes I'm not home until about 9:30 p.m. But the great thing is I put a chicken in the crockpot on low with some veggies and chicken stock and if Mike is home before me or if we make it home for dinner we have a quick easy meal. If not I make chicken salad for lunch on Saturday and use the rest of the chicken in a dish like chicken tacos, or chicken enchiladas on Sunday night. Monday's I'm usually able to stay up at the house but yesterday I had to go to town and got home later than I thought I would. I did not have time to get the dinner that I had planned on the table but you have to be flexible. Not to mention with good planning you will have a pantry of healthy staples. When I cooked my chicken on Friday, I diced the chicken and froze it because I knew I would be making something without chicken on Sunday.
Last nights chicken dinner:
about 2 cups of diced chicken
a can of black beans
a small can of green chili
just mix the above and place in a 9 by 13 baking dish and top with cheese and bake at 350 degrees until hot and melted about 30 minutes.
I served it on top of quinoa. I cooked the quinoa like a spanish rice. I started by doing a saute' of onion, garlic and then some diced tomatoes. Once I put the tomatoes in I add the quinoa, one part quinoa to two parts liquid, I like to use chicken stock. season with salt and pepper bring to a boil and then cover and turn to a slow simmer and cook about 15-20 mins.
I also made some oatmeal cookies that were a big hit! they are high in fiber and protein and low in fat, they average about 60 calories per cookie.
Steel Cut Oat Cookies
1 1/2 cups spelt flour
1 1/2 cups steel cut oats
1/2 cup chia seeds
1/2 teaspoon baking powder
1/2 teaspoon baking soda
1/2 teaspoon kosher salt
1/2 teaspoon ground cinnamon
5 tablespoons butter
5 tablespoons coconut oil
1 cup coconut or palm sugar
1 large egg
I also added in a half cup of dark chocolate chips and 1/2 cup of cranberries.
mix sugar, butter, coconut oil, vanilla and egg in blender adding in dry ingredients.
bake in a 375 degree oven for 10-13 minutes.
Tuesday, March 6, 2012
Sunday, February 19, 2012
Post Valentines Day menu:
This Valentines Day I had the pleasure of catering a meal for my oldest Son, Michael and his beautiful Wife, Michelle along with another wonderful couple.
Mike Sr. and I had planned to have a nice steak dinner the night before and have a "date night" on Friday. I'm not big on going out on Valentines Day, Mother's Day, Father's Day, or Easter Sunday! No thanks!
Michael said "Mom, make whatever you want" So the excitement began! First thing I did was run to the sales adds. They had the small 4 oz. lobster tails on sale for $5.00 each. I prefer the small ones because they cook faster with less chance of over cooking and over cooking seafood is like throwing your money down a hole. Also, they taste a little sweeter to me. Next, boneless skinless chicken breast on sale for $.99 lb SCORE! Next....the sides? Asparagus $1.99 lb, I just picked up a ten pound bag of red potatoes at Costco. Dessert...hmmm? it's valentines day so let's do my FAVORITE, CHOCOLATE covered strawberries!
The menu was as follows: Lobster Salad, w/avocado & cherry tomatoes served in a champagne glass with a tarragon & lemon dressing.
For the Lobster Salad I poached the lobster tails in white wine and butter. I filled a large stock pot about 1/3 of the way with water and added about 1 cup of white wine and 1/4 cup of butter. Once it started to boil I turned the heat down to a simmer and put the lobster in for about 5 mins. and removed it from the poaching liquid and let cool.
I made the dressing using about a 1/2 cup of mayo.
the juice of two Meyer lemons
about two tablespoons fresh chopped tarragon
1 teaspoon lemon pepper
a sprinkle of my all time favorite "Cavanders Greek Seasoning"
and kosher salt to taste.
The rest is even easier, just remove the lobster meat and dice in nice big pieces, toss in halfed cherry tomatoes and a diced avocado, mix with the dressing and serve on a bed of lettuce.
For catering purposes I chilled the ingredients separately and built the salads on site that's when I added the avocado so it would not brown.
Chicken Cordon Bleu, with a twist of course. I used proshutto and I used gruyere and a local jack cheese with a topping of panko bread crumbs, parmesan and fresh thyme.
I laid out plastic wrap and placed 4 boneless skinless chicken breast down and then covered with another layer of plastic wrap. Then pound it out, so that they almost double in size. Next place a layer of prochuto and top with a grated mixture of the cheese. Fold in the top and bottom and then roll. Place on a piece of clean plastic wrap and roll the chicken tight by gathering the ends. Place the wrapped chicken rolls in the fridge for at least an hour.
Mix the panko bread crumbs (about 2 cups) and 1/2 cup of parmesan, along with about a tablespoons of fresh thyme. Season with fresh ground black pepper, you really won't need much in the way of salt because the proshutto and the cheese will be salty.
preheat the oven to 350 degrees, unroll chicken from the plastic wrap and place each piece in an egg bath (whisk 2 eggs, a couple tablespoons of half & half and more fresh cracked pepper and chopped thyme) then roll in panko mixture and place on baking sheet. Bake for 25-30 mins. let sit for about 5 minutes before serving.
I grilled the asparagus on an indoor grill, before serving drizzle with olive oil and season with salt and pepper.
The potatoes were roasted and tossed with garlic, lemon juice and lemon zest.
I had started a batch of homemade rolls and forgot them in the oven only to remember them once I smelled something burning....So I made a quick stop at the Market and made a quick pick of croissants.
Mike Sr. and I had planned to have a nice steak dinner the night before and have a "date night" on Friday. I'm not big on going out on Valentines Day, Mother's Day, Father's Day, or Easter Sunday! No thanks!
Michael said "Mom, make whatever you want" So the excitement began! First thing I did was run to the sales adds. They had the small 4 oz. lobster tails on sale for $5.00 each. I prefer the small ones because they cook faster with less chance of over cooking and over cooking seafood is like throwing your money down a hole. Also, they taste a little sweeter to me. Next, boneless skinless chicken breast on sale for $.99 lb SCORE! Next....the sides? Asparagus $1.99 lb, I just picked up a ten pound bag of red potatoes at Costco. Dessert...hmmm? it's valentines day so let's do my FAVORITE, CHOCOLATE covered strawberries!
The menu was as follows: Lobster Salad, w/avocado & cherry tomatoes served in a champagne glass with a tarragon & lemon dressing.
For the Lobster Salad I poached the lobster tails in white wine and butter. I filled a large stock pot about 1/3 of the way with water and added about 1 cup of white wine and 1/4 cup of butter. Once it started to boil I turned the heat down to a simmer and put the lobster in for about 5 mins. and removed it from the poaching liquid and let cool.
I made the dressing using about a 1/2 cup of mayo.
the juice of two Meyer lemons
about two tablespoons fresh chopped tarragon
1 teaspoon lemon pepper
a sprinkle of my all time favorite "Cavanders Greek Seasoning"
and kosher salt to taste.
The rest is even easier, just remove the lobster meat and dice in nice big pieces, toss in halfed cherry tomatoes and a diced avocado, mix with the dressing and serve on a bed of lettuce.
For catering purposes I chilled the ingredients separately and built the salads on site that's when I added the avocado so it would not brown.
Chicken Cordon Bleu, with a twist of course. I used proshutto and I used gruyere and a local jack cheese with a topping of panko bread crumbs, parmesan and fresh thyme.
I laid out plastic wrap and placed 4 boneless skinless chicken breast down and then covered with another layer of plastic wrap. Then pound it out, so that they almost double in size. Next place a layer of prochuto and top with a grated mixture of the cheese. Fold in the top and bottom and then roll. Place on a piece of clean plastic wrap and roll the chicken tight by gathering the ends. Place the wrapped chicken rolls in the fridge for at least an hour.
Mix the panko bread crumbs (about 2 cups) and 1/2 cup of parmesan, along with about a tablespoons of fresh thyme. Season with fresh ground black pepper, you really won't need much in the way of salt because the proshutto and the cheese will be salty.
preheat the oven to 350 degrees, unroll chicken from the plastic wrap and place each piece in an egg bath (whisk 2 eggs, a couple tablespoons of half & half and more fresh cracked pepper and chopped thyme) then roll in panko mixture and place on baking sheet. Bake for 25-30 mins. let sit for about 5 minutes before serving.
I grilled the asparagus on an indoor grill, before serving drizzle with olive oil and season with salt and pepper.
The potatoes were roasted and tossed with garlic, lemon juice and lemon zest.
I had started a batch of homemade rolls and forgot them in the oven only to remember them once I smelled something burning....So I made a quick stop at the Market and made a quick pick of croissants.
Wednesday, January 25, 2012
I never thought it could be so easy!
Yesterday was one of those days. I forgot to take something out for dinner early enough. Funny thing is I remember an episode of "Diners, Drive-In's and Dives" and they featured a boiled beef. Boiled beef? Yuck...lol...So I did as follows:
one froze beef roast, in a dutch oven covered with water, tossed in an onion and some garlic as well as salt and pepper. brought to a boil turned to low and let simmer until fully cooked. I was a little worried when I sliced it and its texture was like shoe leather. But then the magic was about to happen")
I made a beef gravy w/the liquid that the roast had boiled in. With a little butter and flour and more seasoning the gravy was tasting good! I then did as they did on t.v. I took the sliced roast and placed it in a baking dish and poured the gravy on top. You want the meat drowning in gravy. I placed foil over it and into a 350 degree oven for about an hour and a half.
When it was time to serve the meat could be cut with a butter knife!
What to do with this wonderful meat? I decided on beef sandwiches but did not want to use regular bread and the hamburger buns in my freezer left something to be desired, freezer burn to say the least.
I did not want to go to the market for buns, so I made my own hamburger buns! THEY were so EASY and tasted SO GOOD! It was a proud moment for me and I will try my best to never buy a store bought bun again. I can't wait to try this recipe with different flours like spelt. Here is the recipe that I found, the original called for cracked wheat flour but I used AP because that's what I had.
3/4 c. warm water
3 teaspoons yeast
2 tablespoons honey
2 tablespoons melted butter
1 egg
1 teaspoon salt
2 1/2-3 cups flour
in stand mixer bowl combine warm water & yeast, let sit for 5 min.
add the honey, melted butter & egg.
beat until smooth.
add 2 cups flour. beat until smooth.
and salt and enough remaining flour to create a kneadable dough. your dough will completely pull away from the sides of mixing bowl.
knead on low setting in mixer for about 6 minutes.
cover dough and let rest about 10 minutes.
divide into 8 rounds.
place on greased parchment paper (I use baking pads and don't grease) flatten out the tops.
let buns rise until doubled and if desired brush with egg whites and add sesame seeds or whatever. I used italian seasoning and parmesan. bake at 350 degrees about 15 minutes.
one froze beef roast, in a dutch oven covered with water, tossed in an onion and some garlic as well as salt and pepper. brought to a boil turned to low and let simmer until fully cooked. I was a little worried when I sliced it and its texture was like shoe leather. But then the magic was about to happen")
I made a beef gravy w/the liquid that the roast had boiled in. With a little butter and flour and more seasoning the gravy was tasting good! I then did as they did on t.v. I took the sliced roast and placed it in a baking dish and poured the gravy on top. You want the meat drowning in gravy. I placed foil over it and into a 350 degree oven for about an hour and a half.
When it was time to serve the meat could be cut with a butter knife!
What to do with this wonderful meat? I decided on beef sandwiches but did not want to use regular bread and the hamburger buns in my freezer left something to be desired, freezer burn to say the least.
I did not want to go to the market for buns, so I made my own hamburger buns! THEY were so EASY and tasted SO GOOD! It was a proud moment for me and I will try my best to never buy a store bought bun again. I can't wait to try this recipe with different flours like spelt. Here is the recipe that I found, the original called for cracked wheat flour but I used AP because that's what I had.
3/4 c. warm water
3 teaspoons yeast
2 tablespoons honey
2 tablespoons melted butter
1 egg
1 teaspoon salt
2 1/2-3 cups flour
in stand mixer bowl combine warm water & yeast, let sit for 5 min.
add the honey, melted butter & egg.
beat until smooth.
add 2 cups flour. beat until smooth.
and salt and enough remaining flour to create a kneadable dough. your dough will completely pull away from the sides of mixing bowl.
knead on low setting in mixer for about 6 minutes.
cover dough and let rest about 10 minutes.
divide into 8 rounds.
place on greased parchment paper (I use baking pads and don't grease) flatten out the tops.
let buns rise until doubled and if desired brush with egg whites and add sesame seeds or whatever. I used italian seasoning and parmesan. bake at 350 degrees about 15 minutes.
Saturday, January 7, 2012
dinner time and such: Ciabatta rolls
dinner time and such: Ciabatta rolls: Off to a fantastic start to the New Year! I was invited to a girls night out recently the menu was a YUMMY chicken tortilla soup and salad. ...
Ciabatta rolls
Off to a fantastic start to the New Year! I was invited to a girls night out recently the menu was a YUMMY chicken tortilla soup and salad. I was asked to bring bread so I made a batch of flour tortillas and ciabatta rolls. Here is the recipe I used for the ciabatta.
Ciabatta is a funny kind of bread. Far from the golden domed boules or slender baguettes, this Italian bread is lumpy, rather flat, and most definitely rustic. Baker's lore says that the loaves are meant to resemble comfy old house slippers.
The dough is unusual too. It's extremely wet, with a near equal amount of water and flour. This makes it impossible to knead in the traditional way and difficult to shape into loaves. Traditionally, the dough was kneaded by either slapping it repeatedly against the counter (like brioche) or giving it a series of folds during its long rising time.
It is much easier to knead this wet, sticky dough in a modern standing mixer. This dough requires you to bump the speed above the recommended level for kneading dough, but don't fret. The dough is so wet that it's almost more of a batter than a bread dough. Keep an eye on the mixer during kneading as it has a tendency to bobble itself along the counter. And if your mixer's motor does start to heat up, it's fine to give it rest for a few minutes before completing the kneading.
Once the dough is kneaded and has risen, the key to shaping the loaves from this very loose and sticky dough is lots of flour and handling the dough with velvet gloves. The flour will help prevent the dough from sticking to everything and a gentle touch will keep its network of bubbles from collapsing.
All this fussy work is well worth it when those loaves come out of the oven. The crust is crackling and deeply toasted. The interior is glossy and honeycombed with holes.
No two loaves or rolls of ciabatta ever turn out quite the same. This is something I love about this bread and that keeps me making it again and again. Whether I'm baking loaves for a dinner party or a batch of rolls for my own lunches during the week, ciabatta never fails to deliver.


Ciabatta is a funny kind of bread. Far from the golden domed boules or slender baguettes, this Italian bread is lumpy, rather flat, and most definitely rustic. Baker's lore says that the loaves are meant to resemble comfy old house slippers.
The dough is unusual too. It's extremely wet, with a near equal amount of water and flour. This makes it impossible to knead in the traditional way and difficult to shape into loaves. Traditionally, the dough was kneaded by either slapping it repeatedly against the counter (like brioche) or giving it a series of folds during its long rising time.
It is much easier to knead this wet, sticky dough in a modern standing mixer. This dough requires you to bump the speed above the recommended level for kneading dough, but don't fret. The dough is so wet that it's almost more of a batter than a bread dough. Keep an eye on the mixer during kneading as it has a tendency to bobble itself along the counter. And if your mixer's motor does start to heat up, it's fine to give it rest for a few minutes before completing the kneading.
All this fussy work is well worth it when those loaves come out of the oven. The crust is crackling and deeply toasted. The interior is glossy and honeycombed with holes.
No two loaves or rolls of ciabatta ever turn out quite the same. This is something I love about this bread and that keeps me making it again and again. Whether I'm baking loaves for a dinner party or a batch of rolls for my own lunches during the week, ciabatta never fails to deliver.
Homemade Ciabatta
Makes 2 loaves or 16 rolls
Note: Weighing all the ingredients in this recipe is highly recommended. The biga, or pre-ferment, needs to be made the night before baking and allowed to sit for several hours. Don't skip this little step as it's the biga that helps give ciabatta its complex flavor, chewy crumb, and extra-crispy crust
Biga
4 ounce (1/2 cup) water
1/2 teaspoon active-dry yeast
5 ounce (1 cup) all-purpose flour
Dissolve the yeast in the water. Add the flour and stir to form a thick, gloppy paste. Give it a good fifty or so brisk stirs to build up the gluten. Cover and let sit at room temperature eight hours or overnight.
By the next day, the biga will look soupy with many big bubbles dotting the surface.
Ciabatta
17 ounces (2 cups + 2 tablespoons) water
1 teaspoon active-dry yeast
Biga
20 ounces (4 cups) all-purpose flour
2 teaspoons kosher salt
Dissolve the yeast in the water in the bowl of a standing mixer. Scrape the biga into the water and break it up with your spatula or squeeze it between your hands. You don't need to completely dissolve the biga; just loosen it up and break it into stringy blobs.
Add all of the flour and the salt. Stir to form a thick, very wet dough. Let this rest for 10-20 minutes to give the flour time to absorb the water.
Fit your standing mixer with a dough hook and knead at medium speed for 15-18 minutes (Level 5 or 6 on a KitchnAid). Keep a close eye on your mixer as it has a tendency to "walk" on the counter at this speed.
The dough will start off sticking to the bottom and sides of the bowl. Around the 7-minute mark, it will start to pull away from the sides of the bowl, collect around the dough hook, and regularly slap the sides of the bowl. If it doesn't, nudge your mixer speed up a notch. Also, if the dough starts climbing the dough hook, stop the mixer and scrape it down again. By the end of kneading, the dough will look smooth and creamy with a glossy shine. It will puddle back into the bowl once you turn off the mixer, and this is fine.
Cover the bowl and let the dough rise at 70° - 75° for 2-3 hours, until tripled in bulk.
Dust your work surface heavily with flour. Set two sheets of parchment near your work surface. Scrape the dough out of the bowl onto the flour, taking care not to deflate it too much. Dust the top of the dough with more flour. Using a pastry scraper or pizza wheel, cut the dough in two pieces for loaves or into 16 pieces for rolls.
Brush your hands with flour. Working gently but swiftly, scoop the the loaves (or the rolls) one at a time from the work surface to the parchment. Press your fingertips about halfway into the dough to dimple the surface and slightly flatten the loaves (or rolls). Let the loaves (or rolls) rise, uncovered, for 30-40 minutes. When ready to bake, they should look pillowy with many big bubbles just beneath the surface.
Preheat the oven to 475°F while the loaves are rising. If you have a baking stone, put it in the oven now.
When ready to bake, slide the loaves, still on the parchment, onto a pizza peel or baking sheet. Transfer them to the oven to cook, either on the baking stone or directly on the baking sheet if you don't have a stone. Bake for 20-30 minutes, until puffed and golden brown. Slip the parchment out from under the loaves and cool completely before eating.
Makes 2 loaves or 16 rolls
Note: Weighing all the ingredients in this recipe is highly recommended. The biga, or pre-ferment, needs to be made the night before baking and allowed to sit for several hours. Don't skip this little step as it's the biga that helps give ciabatta its complex flavor, chewy crumb, and extra-crispy crust
Biga
4 ounce (1/2 cup) water
1/2 teaspoon active-dry yeast
5 ounce (1 cup) all-purpose flour
Dissolve the yeast in the water. Add the flour and stir to form a thick, gloppy paste. Give it a good fifty or so brisk stirs to build up the gluten. Cover and let sit at room temperature eight hours or overnight.
By the next day, the biga will look soupy with many big bubbles dotting the surface.
Ciabatta
17 ounces (2 cups + 2 tablespoons) water
1 teaspoon active-dry yeast
Biga
20 ounces (4 cups) all-purpose flour
2 teaspoons kosher salt
Dissolve the yeast in the water in the bowl of a standing mixer. Scrape the biga into the water and break it up with your spatula or squeeze it between your hands. You don't need to completely dissolve the biga; just loosen it up and break it into stringy blobs.
Add all of the flour and the salt. Stir to form a thick, very wet dough. Let this rest for 10-20 minutes to give the flour time to absorb the water.
Fit your standing mixer with a dough hook and knead at medium speed for 15-18 minutes (Level 5 or 6 on a KitchnAid). Keep a close eye on your mixer as it has a tendency to "walk" on the counter at this speed.
The dough will start off sticking to the bottom and sides of the bowl. Around the 7-minute mark, it will start to pull away from the sides of the bowl, collect around the dough hook, and regularly slap the sides of the bowl. If it doesn't, nudge your mixer speed up a notch. Also, if the dough starts climbing the dough hook, stop the mixer and scrape it down again. By the end of kneading, the dough will look smooth and creamy with a glossy shine. It will puddle back into the bowl once you turn off the mixer, and this is fine.
Cover the bowl and let the dough rise at 70° - 75° for 2-3 hours, until tripled in bulk.
Dust your work surface heavily with flour. Set two sheets of parchment near your work surface. Scrape the dough out of the bowl onto the flour, taking care not to deflate it too much. Dust the top of the dough with more flour. Using a pastry scraper or pizza wheel, cut the dough in two pieces for loaves or into 16 pieces for rolls.
Brush your hands with flour. Working gently but swiftly, scoop the the loaves (or the rolls) one at a time from the work surface to the parchment. Press your fingertips about halfway into the dough to dimple the surface and slightly flatten the loaves (or rolls). Let the loaves (or rolls) rise, uncovered, for 30-40 minutes. When ready to bake, they should look pillowy with many big bubbles just beneath the surface.
Preheat the oven to 475°F while the loaves are rising. If you have a baking stone, put it in the oven now.
When ready to bake, slide the loaves, still on the parchment, onto a pizza peel or baking sheet. Transfer them to the oven to cook, either on the baking stone or directly on the baking sheet if you don't have a stone. Bake for 20-30 minutes, until puffed and golden brown. Slip the parchment out from under the loaves and cool completely before eating.
The tortillas are super easy!
4 cups AP flour
1 teaspoon salt
2 tesaspoons baking powder
2 tablespoons lard
1 1/2 c warm water
Just mix dry ingrediants and then slowly add in water and mix with your hands. This recipe makes 24 tortillas. I don't have a tortilla press so I just roll them out with my rolling pin and heat on both sides in a large frying pan until lightly browned on each side or to your liking.
Tuesday, November 22, 2011
Kale Soup
I love this time of year because cooler weather means it's time to make big pots of soup!
Kale Soup, is one of my favorites!
For this soup you will need one big pot, I love my dutch oven that my Sister bought me a few years ago. A MUST HAVE!
I used 1 bunch of kale
3 medium potatoes
1 diced onion
2 cloves of garlic
1 package of Linguica sausage
1 can of peeled, diced tomatoes
1 box of chicken stock
red wine
Parmesan cheese
olive oil
This is by far one of the easiest soups you will ever make! Sometimes, I leave out the potatoes and replace with cannellini beans and I have also served over tortellini in place of potatoes. If you can't find linguica substitute for a flavorful sausage or I have used chicken thighs as well. But the linguica gives it a great flavor.
Get your pot hot and drizzle with olive oil, add the sausage and start to lightly brown. Add onion and cook down to a wilt. Add garlic, but be careful not to brown the garlic or it will leave a bitter taste in your soup. Next, deglaze the pan with a good red wine, I use about a cup. Then add the stock and tomatoes. Season with salt and pepper to taste. Next add the chopped kale and simmer down for about 10 minutes. Then add your peeled diced potatoes and simmer until potatoes are cooked though.
Serve with Parmesan cheese and enjoy")
Kale Soup, is one of my favorites!
For this soup you will need one big pot, I love my dutch oven that my Sister bought me a few years ago. A MUST HAVE!
I used 1 bunch of kale
3 medium potatoes
1 diced onion
2 cloves of garlic
1 package of Linguica sausage
1 can of peeled, diced tomatoes
1 box of chicken stock
red wine
Parmesan cheese
olive oil
This is by far one of the easiest soups you will ever make! Sometimes, I leave out the potatoes and replace with cannellini beans and I have also served over tortellini in place of potatoes. If you can't find linguica substitute for a flavorful sausage or I have used chicken thighs as well. But the linguica gives it a great flavor.
Get your pot hot and drizzle with olive oil, add the sausage and start to lightly brown. Add onion and cook down to a wilt. Add garlic, but be careful not to brown the garlic or it will leave a bitter taste in your soup. Next, deglaze the pan with a good red wine, I use about a cup. Then add the stock and tomatoes. Season with salt and pepper to taste. Next add the chopped kale and simmer down for about 10 minutes. Then add your peeled diced potatoes and simmer until potatoes are cooked though.
Serve with Parmesan cheese and enjoy")
Tuesday, November 15, 2011
Easy 30 Minute dinner rolls
I gave these rolls a try last night and they were a big hit! Yes, I will make about 5x this much for Thanksgiving. I'm going to make them the day before and just quickly butter the tops and warm through just before serving. They are EASY! No kneading required!
1 cup plus 2 Tbsp warm water
1/3 cup canola oil
2 Tbsp yeast (rapid rise)
1/2 tsp salt
3 1/2 C flour
Heat oven to 400 degrees.
In your mixer bowl combine the water, oil, yeast and sugar and allow to rest for 15 minutes. Using dough hook mix the salt , egg and flour. Once well incorporated and dough is soft and smooth form into 12 balls. Place in a greased 9x13 pan and allow to rest for 10 minutes. Bake for 10 minutes or until golden brown.
1 cup plus 2 Tbsp warm water
1/3 cup canola oil
2 Tbsp yeast (rapid rise)
1/2 tsp salt
3 1/2 C flour
Heat oven to 400 degrees.
In your mixer bowl combine the water, oil, yeast and sugar and allow to rest for 15 minutes. Using dough hook mix the salt , egg and flour. Once well incorporated and dough is soft and smooth form into 12 balls. Place in a greased 9x13 pan and allow to rest for 10 minutes. Bake for 10 minutes or until golden brown.
Thursday, October 27, 2011
Back in the saddle!
It has been some time since my last post. Much has happened, we moved to Northern California to a town called Somerset. We knew we had some work ahead of us in terms of fixing the house up. Being as this was not our first rodeo, we figured 4-6 weeks and we would be good to go. However, once the demo began the weeks drug out into months. It has only been about a week in a half that I have had my new "Maytag double oven" up and running. The house is almost done on the inside, the downstairs is done with the exception of some odds and ends and a little paint touch up. We still need the upstairs bathroom tiled and we need the carpet laid on the stairway, come Spring we will start work on the outside.
I have to say I became creative with a hot plate, toaster oven, bbq and microwave. I can make a yummy meatloaf on the grill! OH wait....I forgot my beloved CROCK POT! I can make a pretty good crock pot mac n' cheese, not as good as my oven baked but better then a box.
After being without an oven for so so long I have been in the mood to make casseroles. So here is one of my favorites. It might not look pretty but it tastes great and it's packed with veggies and protein and you can substitute pasta for rice, I used the veggie bow tie pasta.
This is a take on an Amish dish that my Aunt made when I was little.
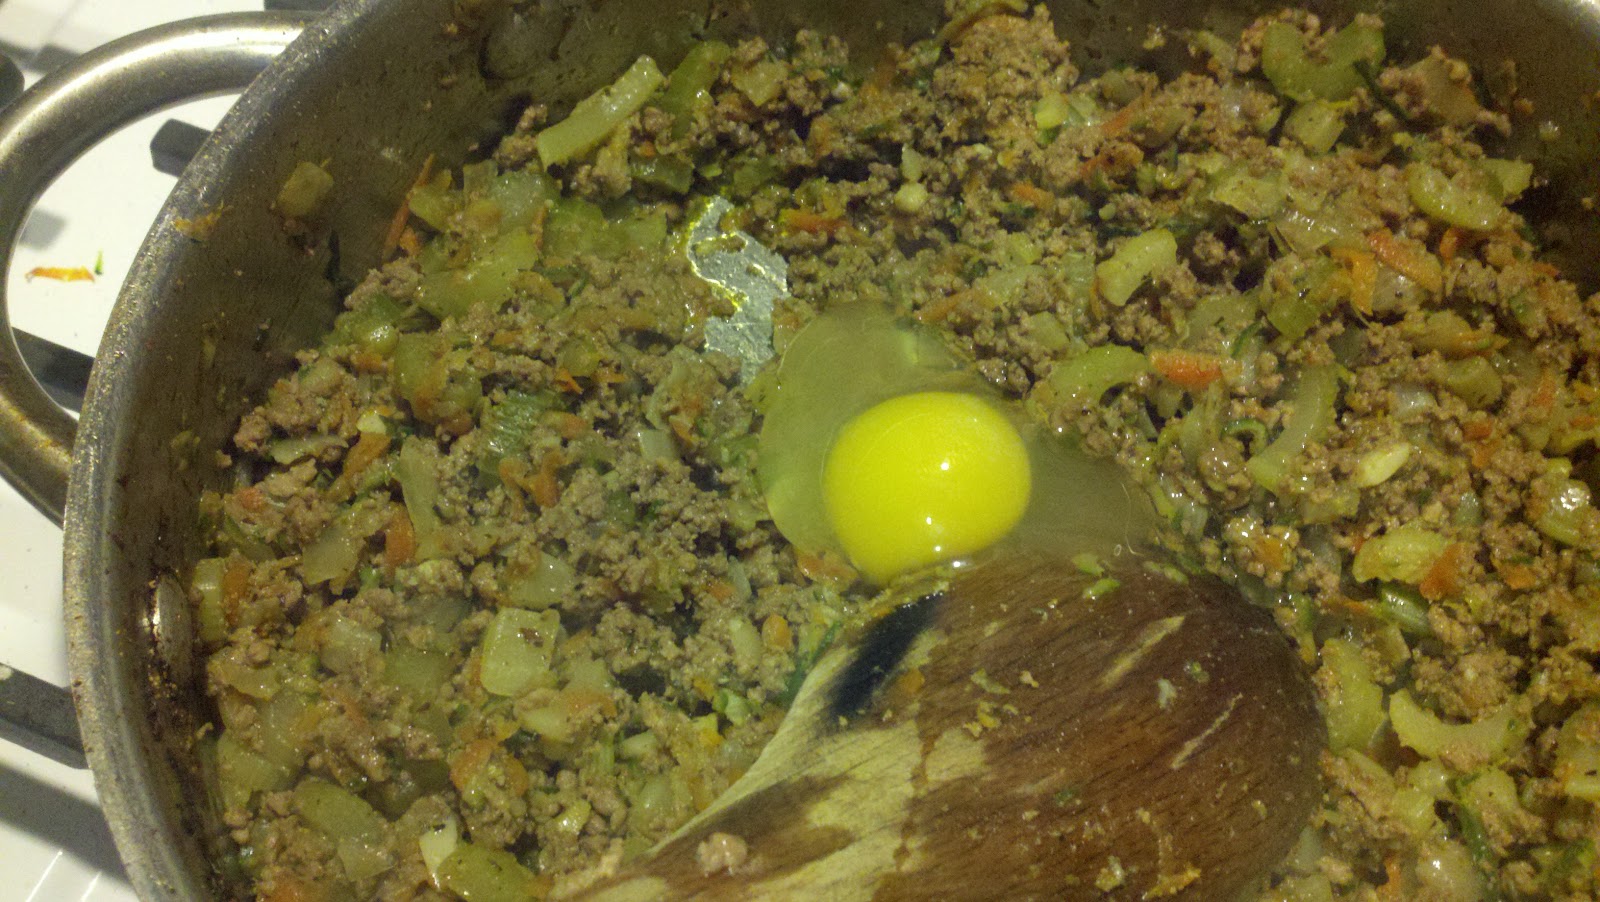
I start with a large pan and some olive oil. Drizzle your olive oil and add one small chopped onion and about 4-5 celery stalks, chopped. cook until tender and add two shredded zucchini and 2-3 shredded carrots. cook on medium heat for 2-3 minutes. Add 2 chopped cloves of garlic. Add 1 pound of ground beef and cook through. Add 1 egg to the pan and cook into the meat. It gives the mixture a silky texture. Once the mixture is cooked set aside.
My aunt used to use a can of cream of something soup. I try not to use can soup as much as possible because of the sodium amounts. So I make a simple gravy w/ 2 tablespoons of butter and the same amount of flour and cook on medium heat. Then I add a cup of chicken stalk and a cup or two of 1% milk depending on how thick I need it. For this dish it's best to be the same consistency as a cream soup.
As I said, I used veggie bow tie pasta. Now it's time to layer noodles, meat mixture, sauce and again. It's a two layer dish. Then I top with cheddar cheese and thick sliced tomatoes. On top of each tomato I sprinkle about a tablespoon of bread crumbs...a couple slices of sourdough bread toasted and then crumbled into a little butter in frying pan until all the bread is coated. Bake at 350 degrees for about 30 minutes. This dish is a great make ahead and freeze dish and also makes great leftovers. Just remember to not over cook your noodles")
I have to say I became creative with a hot plate, toaster oven, bbq and microwave. I can make a yummy meatloaf on the grill! OH wait....I forgot my beloved CROCK POT! I can make a pretty good crock pot mac n' cheese, not as good as my oven baked but better then a box.
After being without an oven for so so long I have been in the mood to make casseroles. So here is one of my favorites. It might not look pretty but it tastes great and it's packed with veggies and protein and you can substitute pasta for rice, I used the veggie bow tie pasta.
This is a take on an Amish dish that my Aunt made when I was little.
I start with a large pan and some olive oil. Drizzle your olive oil and add one small chopped onion and about 4-5 celery stalks, chopped. cook until tender and add two shredded zucchini and 2-3 shredded carrots. cook on medium heat for 2-3 minutes. Add 2 chopped cloves of garlic. Add 1 pound of ground beef and cook through. Add 1 egg to the pan and cook into the meat. It gives the mixture a silky texture. Once the mixture is cooked set aside.
My aunt used to use a can of cream of something soup. I try not to use can soup as much as possible because of the sodium amounts. So I make a simple gravy w/ 2 tablespoons of butter and the same amount of flour and cook on medium heat. Then I add a cup of chicken stalk and a cup or two of 1% milk depending on how thick I need it. For this dish it's best to be the same consistency as a cream soup.As I said, I used veggie bow tie pasta. Now it's time to layer noodles, meat mixture, sauce and again. It's a two layer dish. Then I top with cheddar cheese and thick sliced tomatoes. On top of each tomato I sprinkle about a tablespoon of bread crumbs...a couple slices of sourdough bread toasted and then crumbled into a little butter in frying pan until all the bread is coated. Bake at 350 degrees for about 30 minutes. This dish is a great make ahead and freeze dish and also makes great leftovers. Just remember to not over cook your noodles")
Tuesday, June 7, 2011
Egg Rolls
I realize I have not posted for some time now. It has been a busy last month and a half. We are in the midst of selling our laundromat. The day after signing papers for a 30 + day escrow on the laundromat we loaded up the car and drove to CA to surprise my daughter Britany, for my granddaughter Kiley's, 2nd b-day. We stayed in CA for 3 weeks working on our new home in Somerset. LOTS to do! We are back in CO and being as Hannah stayed in CA with her Sister and Joshua is either with friends or at his Aunts house my cooking has been at a minimum. Lots of grilling, corn on the cob, salads and the beginning of fresh Summer fruits!
I have also become serious about couponing, but not a crazy extreme couponer. I have saved about half of our grocery budget in the last 7 weeks. I have started planing our weekly menus around the sales adds. I always have the best intentions to stick to it but more times then not I decide to do something different. I will say by me taking the time to plan ahead it helps me stick to the stuff I would normally buy leaving me with a well stocked pantry and freezer. So when I stray from my menu I'm well prepared. Sunday was a perfect example. We had plans that fell through with a friends family and my Sisters family. So my Sister came to my house and taught me how to make her delicious egg rolls. Along with her egg rolls I made some teriyaki steak and some fried shrimp that I had in the freezer......the combo was a big hit! Thanks Chrissy for sharing your egg roll recipe......")
Start by quickly sauteing a good tablespoon each of minced garlic and ginger in a drizzle of canola oil or peanut oil.
Then add a bag of slaw mix and let it cook down.
Next add a small bag of bean sprouts and it will also
cook down.
YUM YUM YUM!
I have also become serious about couponing, but not a crazy extreme couponer. I have saved about half of our grocery budget in the last 7 weeks. I have started planing our weekly menus around the sales adds. I always have the best intentions to stick to it but more times then not I decide to do something different. I will say by me taking the time to plan ahead it helps me stick to the stuff I would normally buy leaving me with a well stocked pantry and freezer. So when I stray from my menu I'm well prepared. Sunday was a perfect example. We had plans that fell through with a friends family and my Sisters family. So my Sister came to my house and taught me how to make her delicious egg rolls. Along with her egg rolls I made some teriyaki steak and some fried shrimp that I had in the freezer......the combo was a big hit! Thanks Chrissy for sharing your egg roll recipe......")
Start by quickly sauteing a good tablespoon each of minced garlic and ginger in a drizzle of canola oil or peanut oil.
Then add ground pork and cook until browned. This was a double batch so we used
two pounds of ground pork.
Season with two teaspoons of soy sauce, garlic powder, pepper and about
a tablespoon of brown sugar.
This is a ginger sesame sauce and she added about a 1/4 cup.
If you can't find this at a store near you I would recommend using sesame oil to taste.
Next add a small bag of bean sprouts and it will also
cook down.
Next add 4 scrambled eggs to the mixture.
Time to roll.....and no need to skimp on the filling!!!
Fry in hot peanut oil.....")YUM YUM YUM!
Thursday, April 21, 2011
dinner time and such: Coffee Cake w/bacon? YES!.....compliments of Melis...
dinner time and such: Coffee Cake w/bacon? YES!.....compliments of Melis...: "First we’re going to make ourselves some brown sugar bacon. I got this idea for this bacon from one of my favorite cooking blogs called h..."
Coffee Cake w/bacon? YES!.....compliments of Melissa Vanni and www.prettyyummyfoods.com
First we’re going to make ourselves some brown sugar bacon. I got this idea for this bacon from one of my favorite cooking blogs called http://www.joythebaker.com/. She is pretty stinkin cool.
Pre heat your oven to 350. Line a cookie sheet with some wax paper, then spray your wax paper with Pam. Place 5 strips of bacon on your cookie sheet and sprinkle a bit of brown sugar over them.
You should absolutely be excited about this bacon because it is going to be pretty awesome.
Pop your bacon in the oven and let it bake for about 12-15 minutes. When your bacon is done transfer it to a plate to cool, but don’t drain it on paper towels. You’ll end up with paper towel and brown sugar bacon. Not good.
After your bacon has cooled chop it up & keep it handy.
Is it weird that I want to lick that wax paper? I didn’t think so.
For the streusel topping whisk together 1/4 cup flour, 2/3 cup white sugar, and 2 teaspoons of ground cinnamon.
After you have mixed that up drop in 4 tablespoons of butter.
Now get your hands in there and mix the butter into your flour and sugar combo. You’ll want the texture to resemble coarse crumbs.
Did you keep that bacon handy? Good, mix it into your streusel.
Yes I want you to use your hands. You already washed them? Well you can wash them again.
I found this coffee cake recipe on http://allrecipes.com/. I am a big, BIG fan of this site.
A few months ago I made a fancy, egg white, chocolate chip, coffee cake and got a smack down from the coffee cake police (aka my husband & his friend). They like their coffee cake to be traditional, just like mom use to make, and this one was perfect!
In your food processer (or large bowl) combine 2 cups of flour, 3/4 cup of white sugar, 2 teaspoons baking powder, 1/2 teaspoon salt. Give that a good pulse.
Now throw in 1/2 cup of butter,
and pulse that until it looks like coarse crumbs. If you don’t have a food processor you’ll need to do this by hand.
Now add 1 egg, 3/4 cup of milk (I combined the two) and 1 1/2 teaspoons of vanilla extract.
Pulse, pulse, pulse until it is just moistened.
Now pour your batter into a buttered 9 by 13 inch pan.
Sprinkle your bacon streusel on top of your batter and pop this into a 350 degree oven for 25 – 30 minutes. Mine was perfect at 27 minutes.
Here is your lovely streusel right out of the oven…
and here it is on a pretty plate. Get ready to knock your mother-in-law’s socks off!
I hope your Easter is full of family, friends, and good food.
Enjoy!!
Ingredients
- 2 cups flour
- 3/4 cup white sugar
- 2 teaspoons baking powder
- 1/2 teaspoon salt
- 1/2 cup butter
- 1 egg
- 3/4 cup milk
I can't wait to make these as a muffin next! Thanks again, Melissa @ prettyyummyfoods.com!
Monday, April 18, 2011
Green Chili w/Chicken
I love this dish! It is quick and easy!
Living in Colorado and close to New Mexico I have been introduced to the world of green chili!
typically, you will find it made with pork, but I make mine with chicken and you can also do a vegetarian version.
Ingredient's:
1 package of frozen diced hatch green chili's
1 onion (diced)
2 cloves garlic (diced)
1 box chicken stock
3 boneless skinless chicken breasts
diced cilantro to taste
saute onion and garlic in about 2 tablespoons canola oil.
remove from pan and add diced chicken that has been dredged in flour and seasoned with salt & pepper.
after chicken is browned add the onion mixture, chili's and chicken stock.
simmer for about 30-45 mins and the last 10 mins. of simmering add chopped cilantro to taste.
I like to garnish with more cilantro and diced avocado and cheese (the cheese is so my kids eat it)
Monday, April 11, 2011
Brownie w/Berries & Cream
This is a great "go to" dessert! We went to a family dinner this weekend at my sisters house. I said I would bring dessert.
Just buy your favorite brownie mix. I use melted butter instead of oil and brewed coffee in place of water, I divide the batter into two cake pans and bake according to package.
Then use one small tub of cool whip at room temp. and one small can of sweetened condensed milk. mix together and layer your brownie rounds w/ cream and fresh berries.
Refrigerate until ready to serve.......it's even better with a scoop of ice cream!
Just buy your favorite brownie mix. I use melted butter instead of oil and brewed coffee in place of water, I divide the batter into two cake pans and bake according to package.
Then use one small tub of cool whip at room temp. and one small can of sweetened condensed milk. mix together and layer your brownie rounds w/ cream and fresh berries.
Refrigerate until ready to serve.......it's even better with a scoop of ice cream!
Wednesday, April 6, 2011
Seared Scallops and Butternut Squash Risotto
I love making risotto! You can make it so many different ways. If you have never tried making it don't be afraid it is an impressive dish served as a main course with chicken or seafood added or as a side dish plain or with different vegetables. I made mine with some butternut squash that I needed to cook, but it's good with mushrooms, pumpkin or plain with fresh herbs tossed in at the end....I also like making a lemon risotto.
1 small onion or shallot
2 cups arborio rice
1 cup dry white wine
4 cups chicken stock (I use low sodium)
1 roasted butternut squash
1 cup finely grated parmesan cheese
kosher salt and pepper
fresh parsley
Slice squash in half & clean out the seeds.
Drizzle with olive oil and season with kosher salt.
Roast in a 400 degree oven for about 20 minutes or until tender.
If using the squash spoon it into the chicken stock and puree.
The big key to any good risotto is not to add cold liquid.
Bring the stock and squash mixture to a simmer,
also in a separate pan I slightly heat the white wine.
Next add about two tablespoons of olive oil to a large fry pan.
add the shallots and cook them to a wilt.
I don't let them brown or they get bitter.
scoop the shallots out and set aside.
Add the rice to the pan and toss it around so that it all gets coated in the olive oil
the rice will start to look translucent. Make sure your temperature is at med-high and add the wine and
the cooked shallots.
Once you add the liquid you want to stir it until it begins to evaporate and cook into the rice.
Stirring the rice helps to break it down and give it a creamy texture.
As the liquid cooks down continue to add your Stock about a cup at a time and stir.
Once all your stock is added and cooked down turn the heat to low.
stir in the cheese and salt and pepper to taste.
If you wanted you could also stir in some butter (but I don't)
top with fresh parsley and serve hot!
I like to make scallops with this because they are so quick and easy!
All I do is wash the scallops and dry them on a paper towel.
Season them with salt and pepper and add them to a hot skillet.
Once they are in the skillet I turn the heat to medium high.
Let them cook about 4 mins. Then turn them and let them cook for another 2 mins.
Perfect every time!
Subscribe to:
Posts (Atom)